Friday, 18 April 2014

The fabric

So, you have the ideas in your head, you have your designs all drawn out, which leaves one thing; buying the fabric!
This can either be exasperating or the greatest fun ever.  It gets exasperating when you can’t find what you want, the best fun is when it all comes together with hardly any effort.

I have just returned from my great fabric hunt of 2014.
I have learned to combine the fabric hunt with visiting my husbands’ relatives in the northern lands where the choice of fabric in one town far exceeds anything available in the whole of Norfolk!  This does mean I get two shots a year at this and the first buy up usually involves getting over 50 metres of fabric in one day!

This year I managed to get pretty much everything I wanted and came away on a high (this was rapidly depleted as we hit traffic jam after traffic jam and it took us over 6 hours to get home instead of the normal 4).
Here is the haul piled up on my table;

Now in the sensible world of the seamstress this lot would be washed before sewing but I have a life to lead and I never wash the costume fabrics before a performance!  This way I make the costume to fit and then if it shrinks, or some of the pattern or bling comes off in the wash, it is revamped for the following year without me having a hissy fit!

The one exception I will make to that this year is the Beast’s costume as I may need to use the padded shirt for another panto and I don't want a shrunken lining ruining it all.

I didn’t get an elaborate gold for Belle, but I did get some old gold taffeta and a piece of patterned gold that I will use for the bodice and decoration, I expect some bling will appear on that before it is finished. 

I could have bought a yellow colour but if the person I think will play Belle gets the role, she really doesn't suit yellow and it makes her look jaundice.  There is always the possibility she won’t be Belle but it really won’t make a difference in that case.

The big job is to now fold all this fabric up and put it away.  It will probably take all day lol

I am itching to get sewing and trying to work out which costumes I can make that are adjustable so they fit whoever gets the role.

Saturday, 12 April 2014

Victorian pantomime designs

As I blogged about designs I thought you might like to see some Victorian panto designs by Wilhelm that are part of the V&A collection.


Beautiful stuff and maybe I will make one of these some day!

Friday, 11 April 2014

On to the designs

So you have your script and you have the ideas in your head...what next?

I always have a number of ideas floating around and find that the best thing is to make sketches to get some idea of what the plan will look like and generally take my time to figure out if I can make it the way I imagine it.  As I have said before there is a horrendous hiatus in our pantomime from getting the script to actually knowing who will play the role which causes me untold problems as I try to figure out what costume to make.  I also buy the fabric in one go.  There is very little to choose from in Norfolk so when I visit my husband’s family in Bolton it is also a chance to go fabric shopping.

Unfortunately, this year I will be in the northern land a month before the auditions.  This means that I have to think about what I want to do but also have alternatives in my head in case a plan goes completely pear shaped.

A good example of this is the fairies.  I have in my mind the two people I think will be playing them and the costumes I have talked about will work perfectly with them.  But if I am wrong will the costumes I have designed suit the alternate actors?

It is always good to have one or two designs for each character just in case the person playing them really doesn't like them.  And in case you are wondering why you should worry about them when you spend all your time and effort making a costume, take a moment to think what it is like to wear something you don't like, then expand that ten fold with having to stand on stage acting in it night after night.  I don't think it hurts to take an actors opinion into account unless they want something totally unworkable that is not a compromise on what you have designed.

The main roles in our panto are taken with people aged 17-70; there is no way they will want to wear the same style of costume if they are a fairy for example!

Now don't panic if you can’t draw, you don't need to!  You download a variety of croquis.  If you are wondering what a croquis is, it’s a body shape that you just draw your outfit on, if you used to play with paper dolls as a child then you will love this.  There are many available for free here;

http://www.designersnexus.com/fashion-design-portfolio/fashion-design-croquis-template/

Get yourself a variety of body sizes, men and women’s and then you will be able to draw over the top of it with your design.
Here are some designs I have drawn for the fairies with the croquis in the middle.


These aren’t coloured in but I also do a number of similar designs in different colours to see what they look like and pick the one I prefer

They take a few minutes to draw but help tremendously, not only for you but also other people to be able to look at and understand the design you are talking about.


So get downloading and have fun playing around with those designs!

Thursday, 10 April 2014

Which machine?

As a matter of practicality; what machine?

I have a confession to make...I am a machineaholic!
I have collected vintage machines for a number of years and have a few, I like to think that when the sun spots hit and electricity goes down for good I will still be able to sew away on one of my hand cranks or my treadle so it won’t stress me out too much.

Anyway, back to the question, what machine is best for costume making?

The good news is that it doesn't need to cost a fortune to buy a decent machine that will chunder through everything you throw at it.  If you are compelled to buy a new machine then please go ahead but I have a new (ish) one, its about 6 years old now.  It is a Bernina Activa 135 which is a lower range model but did everything I wanted it to do at the time in a delicate kind of way.

Then I started costuming proper and it was as if the machine had decided “enough!  I was never designed for this!”
Luckily my husband mother used to make kilts.  This means that she had a ‘proper’ machine.  It is a Pfaff 30 that she gave me about 10 years ago when she knew I was into sewing.  It was handed over with that ‘oh its old and you will probably never use it’ that is often thought of these vintage wonders. 
Here is a pic of the old man of the sewing machine world;

He will sit there and declare...’come on woman, what else have you got to throw at me...give it here and I will show you what I can do!’

He grabs hold of it by the neck and throws it out the other end with a perfect seam.  I have even sewn pleather onto chicken wire with this (with that leather needle of course, the needle being the one weak link on the Pfaff 30).  The only problem with ‘Bert’ as I like to call him...is that he is a BEAST!  You put the foot on the pedal and he roars into action, I do sometimes wonder who is in control here, Bert or me?

I would like to point out that the Pfaff 30 is the only male in the female dominated society of the home sewing machine.

So for everyday use I go to the Singer 201k;

I would say that none of these machines are good if you can’t leave them out all the time as they weigh a tonne!  I have to get hubby to help out when I need to switch from Sally to Bert.
But Sally is nearly as strong as Bert, she goes through so many layers of fabric at one time you wouldn’t believe and can be lovely and delicate at the same time.  There are also loads and loads of attachments for these vintage machines and there is something wonderful about doing a tiny rolled hem on chiffon with little effort.

Both these machines are from the 1950’s and relatively expensive (in the vintage world) but still very cheap compared to a new model as you can still get them for under £100.

Sally is sitting on a cabinet that houses Gretel the German made Singer 411g who has an array of cams that gives you some wonderful embroidery stitches.  I had to steal a pic off Ismaacs (a wonderful site full of info on vintage machines) as I can't get to Gretel without moving Sally and I don't feel that strong today;


You can of course get a Singer 99k cheap as chips.  I have a few of these as handcranks and electric and are ‘almost’ as wonderful as the 201k to sew with.


It is smaller and lighter than the 201 which is an added bonus.

The only thing I would say to you is get the electrics checked on a vintage model before using them, you don't want to go up in smoke do you?  But even with that they are still cheap to buy, wonderful to use and perfect for the weird and wonderful things you get to sew making costumes.

Tuesday, 8 April 2014

Another Dame Bonnet

Getting bored with the planning process and needing to get a bit more practical, I set to making another bonnet for the Dame.
I had already steamed this hat which was given to me by my mum.
Before steaming, a rather nifty trilby style;


 After steaming;


This time I did actually use a sewing machine and a needle...ok I did use the glue gun too but that was for adding the decorations not the actual bonnet making.
To start with I made a length of bias binding to trim the edge with once I had cut the bonnet.  I didn't want to leave the cut hat too long as the straw has a tendency to fall apart.  I then attached fabric to the inside of the bonnet with pins, this was done before cutting.  Once everything was in place I cut the bottom piece of hat out (see the tutorial on where to cut) and then attached the binding sewing it, and the lining, onto the edge of the straw.


I was using a leather needle on my sewing machine as I doubt a normal needle would have gone through those layers of straw and fabric!
I then pleated a long strip of another fabric and tucked this under the binding before sewing the second side in place.  If I was doing this as a ‘normal’ bonnet I probably would have just sewn some ribbon on at this point and it would have looked nice and pretty.


But it’s Dame Bonnet time again so I grabbed a load of pink organza and smooshed it around the bonnet, pinning it in place until I was pleased with the look.  I then hand sewed this into place (yes I sewed by hand!)

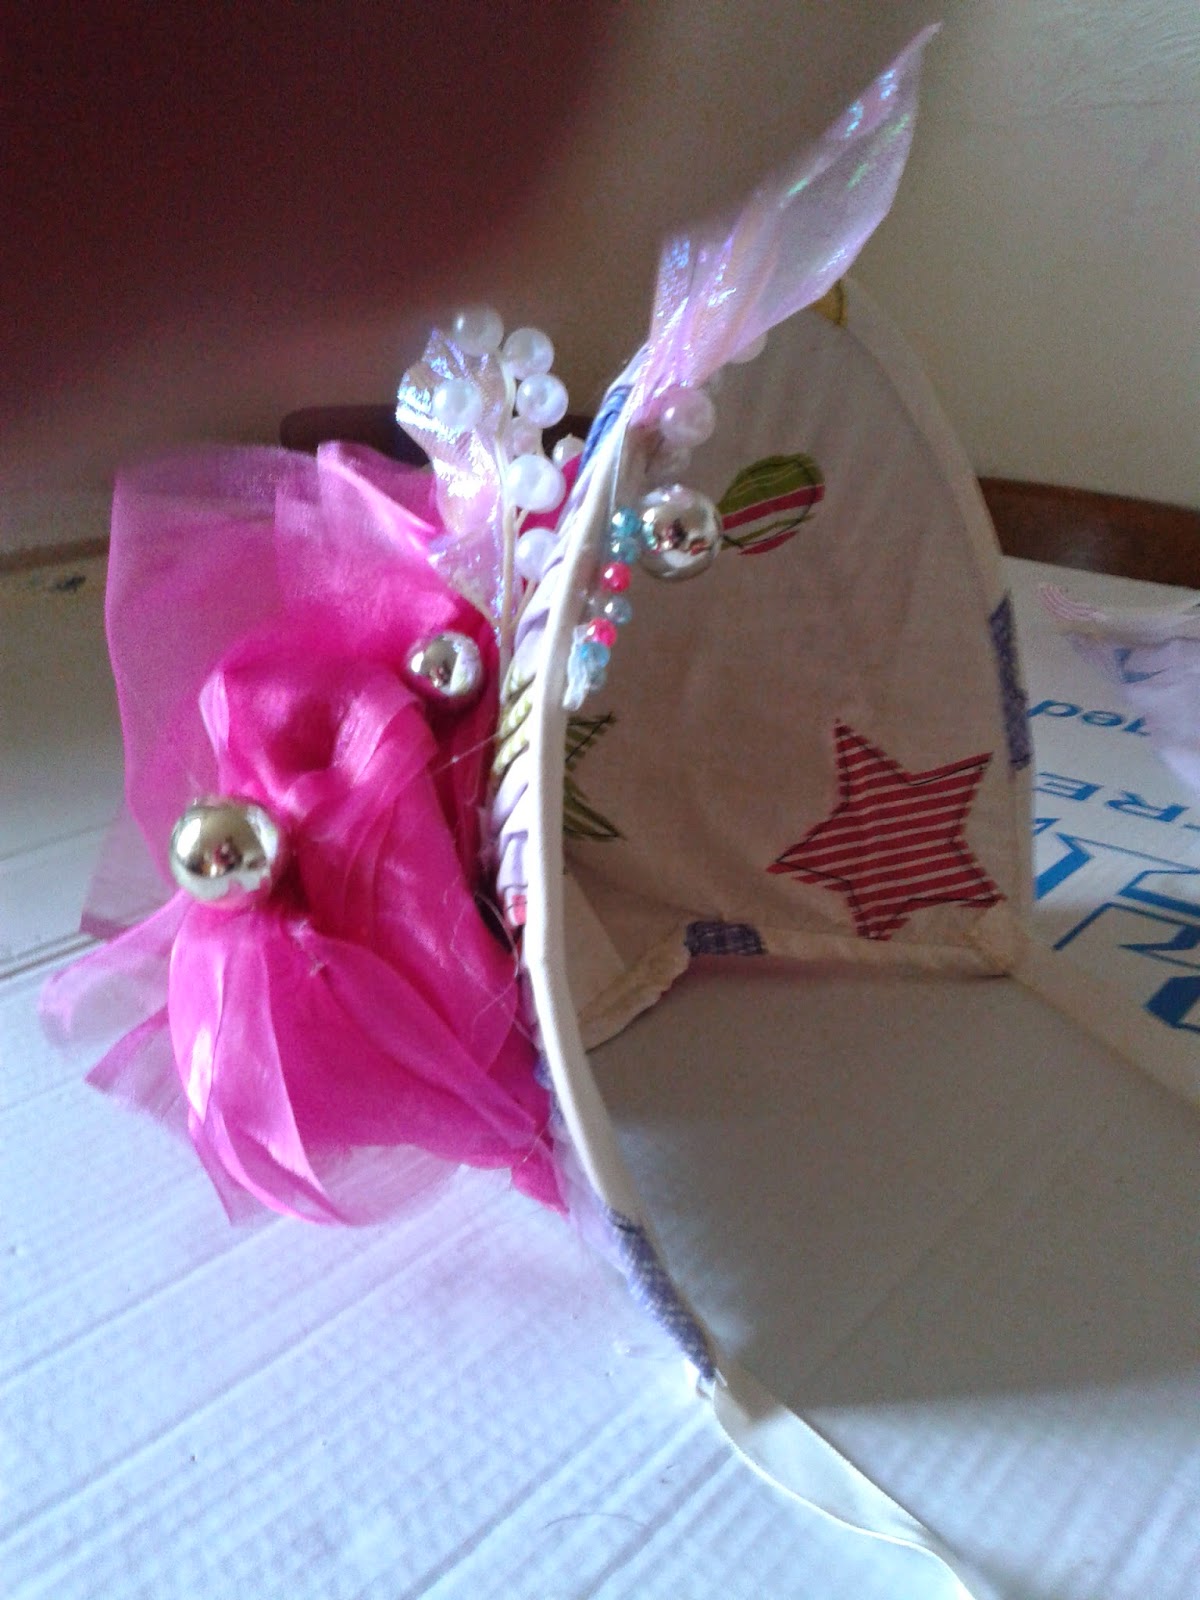
Once the ribbon ties were attached there was only one thing left to do, heat up the glue gun and stick on the bits.  One finished Dames Bonnet:

Fairies galore

The next characters that really draw my attention in a costuming way are fairies.  Unfortunately, last year there was a directorial intervention in the fairy costume that I really should have ignored.  She wanted the fairy to look all punked up (I wanted a tutu), at the last rehearsal before Christmas the fairies mother stepped in as she didn't like her young daughter dressed like that, I told her I agreed completely so there was no hard feeling there lol.   This put a halt to the punk fairy but as there was now no time to make the tutu she ended up in the fairy costume that was one of the few nice costumes we already had on standby.
I have two types of fairy in my head, the young fairy in a tutu and the older one in a floaty ethereal gown.  This year I get to do both, not once but twice!  Good and bad fairies, one of each young and old.
There will definitely be tutus on the young ones.  Of course it will be black for the bad and I will probably do cream for the good.  This is based on the two saris’ I already have in my stash, conveniently one is black with silver and the other is a very pale coffee with the same colour embroidery.

I have this kind of thing in mind for the bad fairy;

It’s a theatre costume by Bruno Santini used in Iolanthe!
For the good fairy I want lots of floaty prettiness, this beautiful gown by Firefly Path sums it up nicely;

I just hope there isn't another attempt at directorial intervention on these, it will have to be ignored this time I’m afraid, and she may not be happy about that!

This is the frustrating time for me, I know the characters, I start to plan costumes, but as I don't know what body the costumes will go on I have to sit and wait drumming my fingers impatiently on the table top.

Monday, 7 April 2014

What a beauty!

Well the meal was a total success in my eyes! Yes, it is Beauty and the Beast and I am so excited about it you wouldn't believe! I also got that money up front so I can relax and plan without worrying about how I am going to pay for everything (I am feeling slightly smug about that and intend to show them what they can get with a bit of extra money).

As I had already spent time thinking about how to make a beast costume, when I was asked offhand how I would do it, my plans were met with a nod and smile of approval.  The directors main concern that a mic would have to be fitted is not a problem with my idea.

So, I don't necessarily hear you ask, what is the plan?

It's based on this...

Please don't laugh!  My daughter had this doll along with pretty much every other Beauty and the Beast saleable item when she was a kid (she still has them all in a display cabinet!).

My plan is to start with a lining fitted to the person playing the beast (don't know who yet, auditions are in May).  Then add a layer of wadding to bulk up the shoulder and chest area just like the doll has.  I will then make a dark blue, velvet frock coat to fit over the top to create a Beast sized torso.

A pair of fur fabric trousers will make the beast look beastly in the body department, I mustn't forget to add a tail!

The head will be made of a half mask sewn to a long wig which will also have horns sewn on.

I am hoping this plan will work and give a good, easy to wear, Beast.  At this point I hope you are muttering to yourself about how I had said some of my costumes do get more complicated lol

Belle will start off with a dirndl style like she does in the film, but I want to make it more of a romantic ballet style skirt with layers of tulle.  I will start with a lilac one (I have the fabric for these) and change to a gold and pink one when she is at the Beast's castle.

This example come from thecostumelady.net/

I am pondering whether to make one petticoat type skirt with layers of white tulle that can go under all Belle's costumes and add a top layer to the dirndl's of the lilac and pink.  This would then also give volume to the most exciting part of this year...

THE GOLD BALLGOWN!!!!!!

Yesssssssssssssssssss, there is a ball room scene!!!!!

Yesssssssssssssssssss, I get to make the gown!!!!!!!

This is not any gown, this is the gown that started me off!  When my daughter was young the Belle doll she had didn't have a gold dress, so mummy made her one!  I then made a few other things then made costumes for the kids, then the kids got bigger and I was making full size costumes lol  It was the first copy of anything I made and it was this dress for this doll and now I get to recreate that on a real life adult woman!  So the hunt is on for the fabric and my mind is working overtime to figure out how close to the original it becomes.  

The other thing is, my daughter is determined that she wants Belle's gold ball gown for her wedding dress.  The wedding is not on the cards but it will be nice to know I have had a practise run when it comes to making that!

As I go through the script I will let you know what goes through my mind and then see what the result are.  Next week I am off fabric shopping....I really hope I find some beautiful gold!


Thursday, 3 April 2014

Inspiration and Interpretation

As the day of our annual meal approaches I began to think of how I got inspired for previous costumes and the results that came from it.
I do tend to spend quite a while foraging through google images for something that starts as a spark and then works its way through to the final costume.
With Snow White I decided I was definitely not going for the Disney version, I felt it too childlike for our principal girl!
I had stashed away a lovely pink and silver sari and wanted to keep that colour scheme with a dress that stood out from all other costumes. 
After filtering out ball gowns and historical dress styles I came across this dress by Basil Soda and fell in love.  Now I know I am not a top designer and there is no way I could do that for real, but I decided this was the dress to base my Snow White on.

It became a basic empire line with floaty bits of silver ribbon, then I made the ‘butterfly’ into a large appliqué with strips of different silver and pink fabrics.  I attempted a go at the shoulders and ended up with something I was pleased to see my daughter wearing on stage...even if it does lack some of the skill in the original.

In Robin Hood I decided Will Scarlett needed to be a warrior type and had wonderful images of leather shoulder armour.  Then I saw the film ‘King Arthur’ and was immediately drawn to the armour they wore.

Of course, being limited again, I did not have the budget or ability to make proper leather armour but did get hold of some plastic leather type fabric and played around with it, and some glue and split pins and came up with this;


I am really hoping that this year, some of the ideas I have rambling around in my mind will be given the time and budget to all come to fruition.  But don't feel you are restricted to what you look at to be inspired, you never know how you will be able to interpret those initial designs into something within your budget!