Showing posts with label Amateur dramatics. Show all posts

Saturday, 2 February 2019

Humpty Dumpty

Some time ago I said that my daughter would be making costumes for this years pantomime.  As they are doing a nursery rhyme theme panto, they are mostly using from the stash of costumes from previous years.
The one she has had to make from scratch is Humpty Dumpty.
Now this did include my help to some degree, but a very small degree consisting of 1 phone call and a number of texts.  So here I go with the details.
Phone call #1
DD "Hi mum, I have to make some shorts for Humpty Dumpty, I have a hula hoop, how do I go about it?"
Me "You need to measure the circumference of the hula hoop, divide by four and draw the waistline of your pattern to that measurement."
DD "What about the rest of it?"
Me "I'll draw a pic and send it to you...."
Still on the phone to her, drawing, taking pic and sending.

DD "So if I draw this pattern and send it to you, where do I sew?"
Me "I'll need a different colour pen, hang on, got the pen!  Ok sending to you."

Me "You sew down the purple bit, then have to sew together the 'J' bit for the crotch."
DD "Ok, will text when I have done the pattern."
The rest is by text.
Pic sent by DD.


Me "Make the legs longer, the 'J' rounder, remember it has to go round the crotch too."
DD "Ran out of paper when realised how long the 'J' would be lol what do you mean by rounder? Also remember the top will be stuck to the hula hoop."
I send back this pic.

Me "Remember I did that with my finger on my  mobile so it's not very accurate!"
DD "Ha ha, ok."


DD "...ish, will cut it rounder!  So is that ok?"
Me "Yeah, looks good, cut legs longer just in case you  need longer crotch than pattern, better to cut some leg off after than have to start from scratch."
DD "Yup was gonna, that way I can cut the length to fit as well.  Will probably cut tonight and make 2 separate legs as well but wait to sew them together tomorrow."
Me "Ok, good luck."

DD "Ok, ended up just keeping on going til I finished lol"
Me "Well done, looks like shorts :)"
The following day this pic arrived. Modelled on 4 year old, being made for older person so obviously too big for the model!

DD "Will have some padding on the shoulders as well."
Me "Excellent job Grasshopper!"
So concludes my tale of how to make a Humpty Dumpty costume.  All I can say is that if she did it from those instructions and sew it all by hand, so can you!


Sunday, 18 January 2015

Mind the gap.....

Between posts!

It's been a bit of a stressful couple of months so please be patient with my lack of writing!

Due to circumstances beyond everyone's control the pantomime was cancelled.  I wont go into details here but it boiled down to many minor, and one major, problems with the cast and illness and it was decided that it was better to cancel than pour money into lighting and staging and have to cancel anyway.  The mantra for the group was that there are many more things important than pantomime performances and on this occasion they had to be put first.

It was a very sad day when me and Auntie Em trundled all the completed costumes out to the caravan.  But then we sat and had a good ol' giggle on how many hours we had sat pondering which way to do things when we may as well have just stuck bin bags together with cellotape!  

On the plus side, if they decide to put it on again next year there is no work for the costume department!

Just as this news had sunk in, my youngest daughter suddenly lost the sight in one of her eyes.  Panicky visits to hospital revealed nothing.  They have no idea what has caused it and, apart from regular visits to hospital for them to check on it, she has been told to just get on with it as it should go eventually.  The good news is that all the horrible reasons for this has been eliminated so we are no longer worrying about all the worse things and waiting for it to go away (apparently she has a swollen optic nerve which is probably caused by a virus of some description).  

Just as we get this news (and I have spent many days at the hospital with her), I get a phone call at half three in the morning.  Yes, eldest daughter went into labour three weeks early!  So back up the hospital I trot and am lucky enough to see my grandson born just four hours later.

Because he was early they kept them in for a week (yet more hospital visits) but they were both home just in time for Christmas, when I decided I wasnt getting any attention and got ill.

I finally went back to work last week although I still appear to be deaf in one ear due to my glands swelling up!

So, that's my excuses and I am more than happy to settle down to normal and be able to post again.

On a positive note, the cancellation of the panto meant I was able to start on my sewing room earlier than anticipated.  Until now I had no dedicated space, but with only one daughter still at home there is now a room available for me.

The move was going to take place after the panto so that all the costumes were put away, hence why it was put forward.  This is due to the wedding in August and a desire not to have bridesmaids and wedding dresses hanging on dummies in the living room for all and sundry to see.

So now things are returning to normality we are on the road to the worlds cheapest wedding.

First step is next week when we are having a wedding invitation bee.  Me and daughters and mother are all gathering at my house to make invitations with an assortment of ribbons and bows and lace etc.  The invitations are a basic bit of card which will be printed on and individually decorated with bits gathered from my stash and liberal use of a glue gun.  That's the general idea anyway, and if it all goes horribly wrong we will be rushing out to buy some made properly!

With everything that was going on I have done hardly any sewing, but things are back on track now so watch this space for a new project I have in hand as well as the beginnings of the wedding plans.

Sunday, 7 September 2014

Pantomime costume update

As promised here is the update!

Belle’s gold dress is now as finished as it will be until nearer the performance (the actress is on a diet so I don’t want to burn my bridges with that) and here is the photo…


 We also made up the costume to the Beast’s man servant, Pierre, using the same tail coat pattern but in a stunning shade of pink with gold flowers.  The actor for this role is known for his Dame performances so we felt the need to camp him up a bit.  He will also be getting a nifty pair of cream crushed velvet breeches to complete the ensemble.  Yet again this is not quite finished as we won’t be adding most of the fastenings on any costumes until near the date of performance.

We completed a number of skirts following the easy skirt tutorial which I won’t bore you with pictures of and some more tunics/waistcoats.  As I said earlier, we will be having the first rehearsal on Wednesday which means we will be getting measurements for those we have missed.  The big jobs left are dresses for Belles two sisters and the fairy dresses.  We are ahead of schedule on all costumes so I am feeling particularly relaxed about it all.

On the other hand, today I learned that eldest stepdaughter is planning to get married in September next year…………don’t panic!!!!!


Friday, 15 August 2014

Sewing on hold

Yesterday, I did no sewing! 

Auntie Em came round and we sat and played with the various bits of gold stuff that was available and decided on what trim to use on the gold dress.  But then we got distracted by the prospect of the costume for the Beast’s manservant Pierre. 

Now the director had suggested that he was dressed in doublet and hose, but me and Auntie Em found this a strange choice of costume being totally out of keeping with the time frame of the other costumes.  So we made an executive decision that Pierre should be similarly dressed to Beast in a frock/ tail coat.  The actor playing Pierre is also known for his wonderful Dame performances which will be sadly lacking in this year’s panto.   It therefore seems appropriate for Pierre to be the campest manservant in history, just so that the actor can strut his stuff you understand.

Texts were exchanged with him and we sat giggling away as we sorted out some lovely pink/gold jacquard for the coat, gold stripes for a waistcoat, cream crushed velvet breeches and lashings of lace.

Eldest daughter then arrived and we had a chat about her scan next week, Auntie Em left, daughter stayed, two other friends turned up and one of them was able to throw some light on a problem that had been developing during the day.

My first suspicions that the antique gold fabric was waxed cotton were proving to be unfounded by me as I inspected it more closely.  The contemplations had continued throughout the day until my other two friends arrived.  One of them does a lot of fabric wall hangings and collage and as soon as I showed it to her she declared it was upholstery silk (she then stuck it between her teeth and chewed on it to confirm her suspicion!) and it was treated with anti-dirt, water and fire resistant coating, hence the waxy feel!
No wonder it looked good and felt so bad!

I had put it in the washing machine and, once the cycle had finished, removed it to find not one drop of water was left on it and I bundled it to one side ready for cutting.  I also cut off a small piece to test ironing and it performed perfectly, holding some pleats in place to perfection.

So I am now about to embark on the gold dress and, unusually for me, I am actually going to use a commercial pattern (Simplicity 4731) that I have had, unused, in my stash for many years.
There will be inevitable changes to this.  I will be making the off the shoulder version but making the sleeve short to give a base for lace and ribbons to be put on. 


I have also decided to put in a side zip on a separate bodice and then do lacings at the back to make the bodice adjustable for others to wear at a later date but will not need to be used during performances.  I am hoping for an end result something like this;

So today I will be sewing again, on two more weeks until the holidays are over so I really need to crack on and get as much finished as possible before I am back at work.

Thursday, 14 August 2014

The fifteen foot rule

I just got the feeling that I should spend a little time explaining how the fifteen foot rule works in my mind.

After posts about using upholstery fabrics, curtains and anything else that comes to hand, I am about to embark on ‘The Ball gown’ to be  worn by Belle that needs to be this panto’s ‘ooh ahh’ dress.  Every panto needs an ‘ooh ahh’ dress.  It is always worn by the princess (or other principal girl role) and she needs to make a grand entrance that makes the audience go… (Wait for it) …. “Oooh, ahh” at the vision of beauty before them.

I had decided, way back when Beauty and the Beast was the desired pantomime and not even confirmed, that I would not be making the ‘ooh ahh’ dress in yellow satin as seems to be the common choice.
The first reason was that I think (and this is only my opinion) that satin does not look good on stage!  By satin I mean the cheap polysatin that is all I would be able to afford, not duchess satin that looks gorgeous and sumptuous and I can only dream of a budget that would stretch to being able to afford that.   Polysatin is too flimsy and has no substance to it and the only way to save it for a dramatic dress would be to cover it in starch.  It also has a shine to it that screams out cheap costume (think of all those fancy dress costumes you can buy that are all made in polysatin).

The second reason is that yellow does not suit everybody and can make them look drained, not a great idea for stage!

So, in my mind I had decided on an antique gold for the gown.
When I went on my big fabric hunt of 2014, one of the things I was looking for was antique gold for the ball gown and I found the perfect colour.  The only problem being that the fabric is a kind of waxed cotton and not too wonderful to the touch.  After continuing on the hunt and finding nothing else, I went back and bought this fabric that was in the perfect colour…all because of the fifteen foot rule.

The simple fact is, it doesn’t matter what the fabric is as long as it looks right!  From fifteen foot away, waxed cotton looks and moves like an expensive taffeta!  Upholstery fabric that matches beautifully with another upholstery fabric looks like expensive jacquard.  Sadly, the perfectly beautiful fabric with flowers appliqued onto it of the same fabric looks a bit bland from fifteen foot away and needs something to lift it and you will find yourself wondering if you should be using it for the costume after all (yes I am talking about Belle’s first dress)!

If, like me, you are a fabricaholic, one of the first things you do when buying the stuff is feel it!  Just remember that nobody in the audience is going to feel the fabric and train yourself to think how it will look from a distance.  Pantomime costume is all about illusion, there is no need to worry about how the seams are finished; nobody will see it.  There is no need to worry about a few tacks here and there that hold the costume in place; nobody will see it, and there is no need to worry about what the fabric feels like; all they will see is something extraordinary on the stage.

If you are looking at something in your living/sewing room and it doesn’t hit you in the face then you can be pretty sure you need to add something.


Today, Auntie Em is coming round and we are going to be deciding on the ball gown and its ‘beautifying’.  The only thing I can guarantee at this point is that we will not be worrying about the fact that the fabric is waxed cotton!

Belle's second dress

When I started on the second Belle costume I realised I had an immediate problem.  The fabric to be used for the skirt is actually upholstery fabric and very thick (but when you only pay £1 a metre you can’t refuse) which gives limitations on how to do the waistband.  As you know, I like to make things adjustable and, with a skirt, that inevitably means  using elastic as the waistband.  This fabric is far too thick for that and would result in a lot of bunching around the waist.

After much contemplation, and a cup or two of coffee with my mum, the best solution appeared to be making a waistband that could be adjusted with buttons in two or three places that would be able to take it in (or our) by up to 6”.

The skirt needed to be worn on a 34” waist so I have tried to work it that this is the middle ‘setting’.

I cut the fabric into gores, three measure 10” at the waist and 3 measure 5”, the small gores were the ones I intended to use for the adjustment.

I sewed one of the large gores to one of the small gores along the same side so I ended up with 3 pieces that look like this;

 I then sewed those three pieces together leaving an 8” gap at the top where the adjustment will take place.


 Each of these pieces now measured 12”, so I cut three pieces 15” by 3”  and applied them as waistband facing by sewing onto the upper edge of the waistband, press and then overstitching.


 I then put buttonholes on the larger gored piece at one end and the button on the smaller piece.  The button can be moved to adjust the size of the skirt.

All it will take now is to move the buttons to change the size of the skirt.
 The bodice was made using the tried and trusted pattern and I made some binding in the co-ordinating fabric for the sleeve edges and eyelets in two other pieces at the front to add a design feature.   I then added broderie anglaise lace to the neck and bottom edges.


This doesn’t sit very well on a dummy that is three sizes too small, but I am sure you get the idea! 

Tuesday, 12 August 2014

Belle's first dress

A couple of weeks ago, Auntie Em brought round this bit of fabric from her mum’s stash. 

I immediately paired it up with the fabric I had used for my younger daughters Victorian dress (that would be the lilac one) and it was a perfect combination.  So out came the Victorian skirt...already made so a bit of a time saver, and off we went to Belle’s house to get her measured. 

The first thing to do was shorten the skirt as the actress is a good 5” shorter than my daughter in the leg department (we have incredibly long legs in my family and my 5’6” daughter has an inside leg measurement of 34”).

I didn't want to do a permanent shortening as there is bound to be a time when daughter wants to wear the skirt again, so I thought of various ways I could take the length off yet make the process reversible.

The plan I came up with is similar to honeycomb smocking (there are many tutorials out there if you want to see how it’s done) but on a larger scale.

The fabric where the red pin is, is pinned to where the black pin is.  The green pin to the yellow pin and I did two lots of this for each section. 


I am lucky in the lilac skirt already had a square pattern in it so I didn't have to measure anything!  I then did a simple stitch to hold each fold in place.

The skirt is now 6” shorter but can be easily returned to its original length.
The bodice was the tried and tested one that I know I can put together in a couple of hours, but the whole effect was a bit bland for stage so out came the purple lace to form the detail at the front, neck edge and bottom of the bodice.


The next project is Belle’s second dress made with this combination of fabrics.

Monday, 11 August 2014

Playing with the good fairy dress

Me and Auntie Em had a play day! I had made a skirt (rectangle and elastic waist) from part of the coffee coloured sari for the good fairy dress which I showed in a previous post.  I then sat there with bits of lace and fabric, pinning them on and trying them out to see what looked good.  I really wasn’t satisfied and then had a moment of inspiration and sewed a layer of tulle over the top of the sari.

It was one of those grrrr moments when I realised the tulle was just a couple of inches short of going round the skirt waist.  I then set to pinning all those bits of lace and fabric on again and it still wasn’t working as I was now trying to cover up the gap.  Then Auntie Em turned up complete with two bags of lace and she did the same as me.  This went on for nearly two hours, pinning, tutting, unpinning.  Then Auntie Em had her own moment of inspiration and suggested turning the skirt and making a feature of the gap instead of trying to hide it.


A lovely bit of lace was soon sewn to the edges and we put some gold leaves and butterflies on.  We left it there as we were going to measure up our ‘Belle’ and didn’t sew any of the bits on, I don’t know if this is how the end product will be or not but it was a fun afternoon!  The top is just the sari end draped over the dummy to give the finished effect as we don’t have the measurements to make the top yet!

Wednesday, 6 August 2014

The Beast continues

The pattern pieces for the tail coat all went together well but I needed to take off 2” at the side front to make it sit properly at the front.  I was admiring my sleeveless jacket when the obvious suddenly hit me...I hadn’t cut out the sleeves!
I measured the armscye...26”, and then the longest bit of fabric left...23”!  It took me a moment (luckily not long enough for me to have a complete breakdown) to realise that the jacket was being made from a PAIR of curtains.  So the sleeves for the Beast’s jacket will need to be cut from the other curtain and the fabric left from the first jacket is enough for the Prince’s jacket....phew, panic over!
As it was getting late I left the sleeves and instead sewed on the stand collar.  Then merrily sat and pinned the lace to the sleeveless jacket so I could spend the rest of the evening looking at it and seeing if there was anything I noticed that I didn't like.


I did spend the evening wisely and ordered a lovely curly wig and a cat mask.  The wig will have the horns sewn onto it and me and Auntie Em are hoping to have wire in them so we can put them in different positions.  The cat mask was ordered after a long debate on how to go about the Beast’s face.  I was adamant that we would not be doing face paint for the performance.  Not only is it likely to run, the same actress has to be the prince at the end so we don't want to be hurrying to wash off face paint when she has to do a quick change.
We contemplated making a mask ourselves, either with foam or paper mache, but in the end went for a pressed cardboard cat mask that we can add our own paper mache to and make it more beastly than kitty.  It will then be painted and hopefully this will work but for the grand sum of £3.99 I won’t be terribly upset if this plan doesn't work.


I’m hoping we will end up with something like this...or something approximately near to maybe like this will do!

Sunday, 13 July 2014

I'm still here.....

I have been quiet for a few weeks as the maternity wear was the last thing I made!  It is the last few weeks of term and I am tired, tired, tired.  I don't want to start on panto costumes as I don't want to get them wrong.  I also have a number of Egyptian accessories to make for the school end of year production, which is today’s job.  I also, via friends at panto, have somehow managed to volunteer my services for 30 drawstring bags for the local scout group. That will be next weekend’s job!

Last weekend there was a garage sale in our village, so me and daughters spent three hours trudging around the streets along with hundreds of other people.  Best buy was a beautiful wooden high chair for £5.  Daughter’s boyfriend kept complaining that he didn't feel right buying things for something that wasn’t there yet...although the retort was, it has a face so it needs something to keep it happy!  He is, of course, secretly very excited but also scared of his approaching parenthood!  Daughter was over the moon to get a copy of ‘The hungry caterpillar’ for 50p.  Apparently, every child needs a copy of ‘The hungry caterpillar’ and ‘We’re going on a bear hunt’, so we are still looking out for the other one.

I also had mother’s birthday weekend and I took her to the theatre to see ‘Dance ‘til Dawn’ which starred Flavia and Vincent from Strictly.  It was a wonderful show full of dancing and singing and a very funny narrative that I would recommend to anyone looking for a good night out!  Mother was over the moon before we even got there, by the end she was like a little girl she had such a good time.  I felt great too, she is not the easiest person to get presents for but we really hit the jackpot with this one!

I also got the list of ‘who is what’ and had some thinking to do!
First up is the fact that my (at the moment small bump) daughter is to play the bad fairy.  She is due to give birth about a month before the performances and will be sharing the role with somebody a couple of sizes smaller.  So this will mean judicious use of the how to make something adjustable in the bad fairy department AND there is only enough of the fabric for one go at this!

I have to find out how to reduce the size of the two tutu’s (try saying that after a few glasses of red medicine) as the baby fairies are teeny tiny.  I also have to go and see various people about their costumes to find out if they are happy with what I have planned and come up with a plan B if they aren't.  At the moment I have £50 of budget left but don't have a wig or mask for Beast or any trimmings, so that will be interesting if I need to replace anything!


So think of this post as the calm before the storm.  The post leading up to the summer holidays when I will spend many days sewing and there will be an influx of things done.  The post that is saying; ‘wait for it’ and ‘bear with’.  Just one and a half weeks left of school and then sit back and watch the costuming begin!

Friday, 18 April 2014

The fabric

So, you have the ideas in your head, you have your designs all drawn out, which leaves one thing; buying the fabric!
This can either be exasperating or the greatest fun ever.  It gets exasperating when you can’t find what you want, the best fun is when it all comes together with hardly any effort.

I have just returned from my great fabric hunt of 2014.
I have learned to combine the fabric hunt with visiting my husbands’ relatives in the northern lands where the choice of fabric in one town far exceeds anything available in the whole of Norfolk!  This does mean I get two shots a year at this and the first buy up usually involves getting over 50 metres of fabric in one day!

This year I managed to get pretty much everything I wanted and came away on a high (this was rapidly depleted as we hit traffic jam after traffic jam and it took us over 6 hours to get home instead of the normal 4).
Here is the haul piled up on my table;

Now in the sensible world of the seamstress this lot would be washed before sewing but I have a life to lead and I never wash the costume fabrics before a performance!  This way I make the costume to fit and then if it shrinks, or some of the pattern or bling comes off in the wash, it is revamped for the following year without me having a hissy fit!

The one exception I will make to that this year is the Beast’s costume as I may need to use the padded shirt for another panto and I don't want a shrunken lining ruining it all.

I didn’t get an elaborate gold for Belle, but I did get some old gold taffeta and a piece of patterned gold that I will use for the bodice and decoration, I expect some bling will appear on that before it is finished. 

I could have bought a yellow colour but if the person I think will play Belle gets the role, she really doesn't suit yellow and it makes her look jaundice.  There is always the possibility she won’t be Belle but it really won’t make a difference in that case.

The big job is to now fold all this fabric up and put it away.  It will probably take all day lol

I am itching to get sewing and trying to work out which costumes I can make that are adjustable so they fit whoever gets the role.

Tuesday, 8 April 2014

Another Dame Bonnet

Getting bored with the planning process and needing to get a bit more practical, I set to making another bonnet for the Dame.
I had already steamed this hat which was given to me by my mum.
Before steaming, a rather nifty trilby style;


 After steaming;


This time I did actually use a sewing machine and a needle...ok I did use the glue gun too but that was for adding the decorations not the actual bonnet making.
To start with I made a length of bias binding to trim the edge with once I had cut the bonnet.  I didn't want to leave the cut hat too long as the straw has a tendency to fall apart.  I then attached fabric to the inside of the bonnet with pins, this was done before cutting.  Once everything was in place I cut the bottom piece of hat out (see the tutorial on where to cut) and then attached the binding sewing it, and the lining, onto the edge of the straw.


I was using a leather needle on my sewing machine as I doubt a normal needle would have gone through those layers of straw and fabric!
I then pleated a long strip of another fabric and tucked this under the binding before sewing the second side in place.  If I was doing this as a ‘normal’ bonnet I probably would have just sewn some ribbon on at this point and it would have looked nice and pretty.


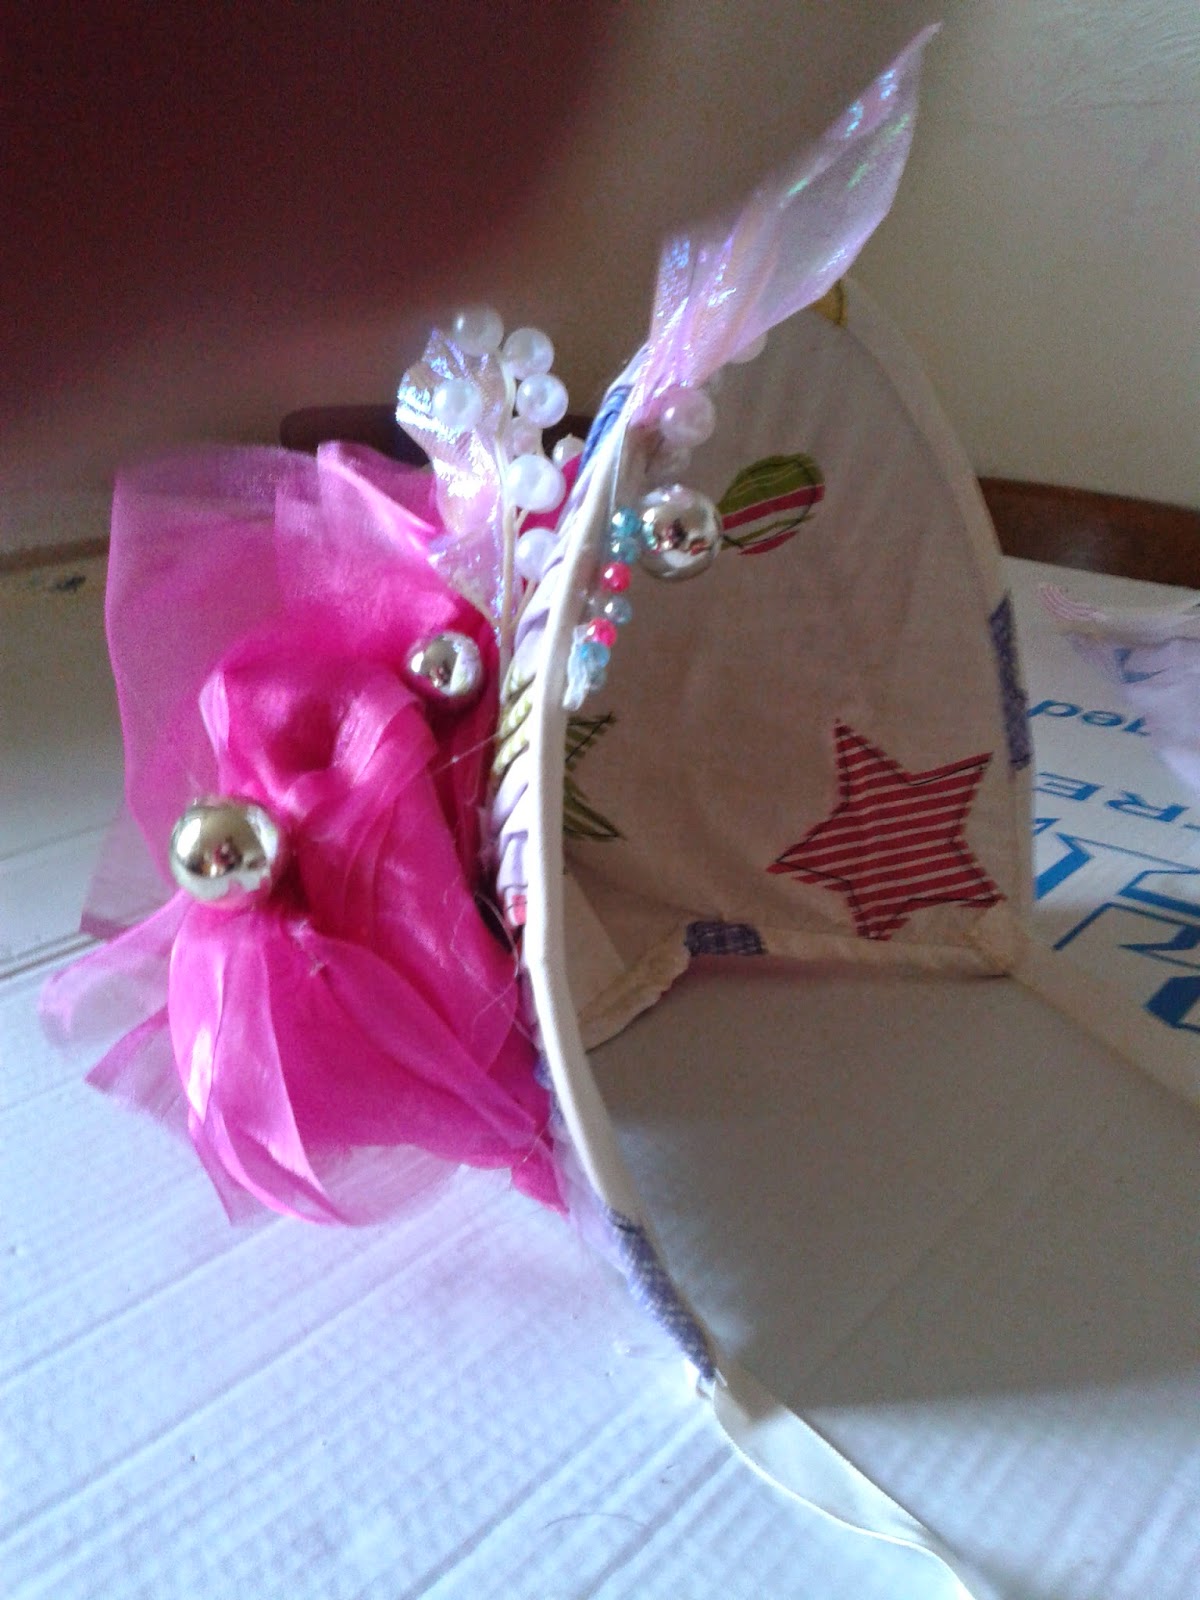
But it’s Dame Bonnet time again so I grabbed a load of pink organza and smooshed it around the bonnet, pinning it in place until I was pleased with the look.  I then hand sewed this into place (yes I sewed by hand!)

Once the ribbon ties were attached there was only one thing left to do, heat up the glue gun and stick on the bits.  One finished Dames Bonnet:

Monday, 7 April 2014

What a beauty!

Well the meal was a total success in my eyes! Yes, it is Beauty and the Beast and I am so excited about it you wouldn't believe! I also got that money up front so I can relax and plan without worrying about how I am going to pay for everything (I am feeling slightly smug about that and intend to show them what they can get with a bit of extra money).

As I had already spent time thinking about how to make a beast costume, when I was asked offhand how I would do it, my plans were met with a nod and smile of approval.  The directors main concern that a mic would have to be fitted is not a problem with my idea.

So, I don't necessarily hear you ask, what is the plan?

It's based on this...

Please don't laugh!  My daughter had this doll along with pretty much every other Beauty and the Beast saleable item when she was a kid (she still has them all in a display cabinet!).

My plan is to start with a lining fitted to the person playing the beast (don't know who yet, auditions are in May).  Then add a layer of wadding to bulk up the shoulder and chest area just like the doll has.  I will then make a dark blue, velvet frock coat to fit over the top to create a Beast sized torso.

A pair of fur fabric trousers will make the beast look beastly in the body department, I mustn't forget to add a tail!

The head will be made of a half mask sewn to a long wig which will also have horns sewn on.

I am hoping this plan will work and give a good, easy to wear, Beast.  At this point I hope you are muttering to yourself about how I had said some of my costumes do get more complicated lol

Belle will start off with a dirndl style like she does in the film, but I want to make it more of a romantic ballet style skirt with layers of tulle.  I will start with a lilac one (I have the fabric for these) and change to a gold and pink one when she is at the Beast's castle.

This example come from thecostumelady.net/

I am pondering whether to make one petticoat type skirt with layers of white tulle that can go under all Belle's costumes and add a top layer to the dirndl's of the lilac and pink.  This would then also give volume to the most exciting part of this year...

THE GOLD BALLGOWN!!!!!!

Yesssssssssssssssssss, there is a ball room scene!!!!!

Yesssssssssssssssssss, I get to make the gown!!!!!!!

This is not any gown, this is the gown that started me off!  When my daughter was young the Belle doll she had didn't have a gold dress, so mummy made her one!  I then made a few other things then made costumes for the kids, then the kids got bigger and I was making full size costumes lol  It was the first copy of anything I made and it was this dress for this doll and now I get to recreate that on a real life adult woman!  So the hunt is on for the fabric and my mind is working overtime to figure out how close to the original it becomes.  

The other thing is, my daughter is determined that she wants Belle's gold ball gown for her wedding dress.  The wedding is not on the cards but it will be nice to know I have had a practise run when it comes to making that!

As I go through the script I will let you know what goes through my mind and then see what the result are.  Next week I am off fabric shopping....I really hope I find some beautiful gold!


Thursday, 3 April 2014

Inspiration and Interpretation

As the day of our annual meal approaches I began to think of how I got inspired for previous costumes and the results that came from it.
I do tend to spend quite a while foraging through google images for something that starts as a spark and then works its way through to the final costume.
With Snow White I decided I was definitely not going for the Disney version, I felt it too childlike for our principal girl!
I had stashed away a lovely pink and silver sari and wanted to keep that colour scheme with a dress that stood out from all other costumes. 
After filtering out ball gowns and historical dress styles I came across this dress by Basil Soda and fell in love.  Now I know I am not a top designer and there is no way I could do that for real, but I decided this was the dress to base my Snow White on.

It became a basic empire line with floaty bits of silver ribbon, then I made the ‘butterfly’ into a large appliqué with strips of different silver and pink fabrics.  I attempted a go at the shoulders and ended up with something I was pleased to see my daughter wearing on stage...even if it does lack some of the skill in the original.

In Robin Hood I decided Will Scarlett needed to be a warrior type and had wonderful images of leather shoulder armour.  Then I saw the film ‘King Arthur’ and was immediately drawn to the armour they wore.

Of course, being limited again, I did not have the budget or ability to make proper leather armour but did get hold of some plastic leather type fabric and played around with it, and some glue and split pins and came up with this;


I am really hoping that this year, some of the ideas I have rambling around in my mind will be given the time and budget to all come to fruition.  But don't feel you are restricted to what you look at to be inspired, you never know how you will be able to interpret those initial designs into something within your budget!

Sunday, 23 March 2014

Why you need to plan so much in advance

When you are making costumes for so many people (mine average out to around 30 a year), it pays to plan in advance.  I have been in the situation of three weeks to go and not all principal players’ costumes made and it is not good.  That is when the stress sets in and enjoyment of the project goes flying out of the window.
Christmas is spent chained to the sewing machine and, as is often the case with me, if you get ill on top of that the whole thing becomes a weight around your neck.
As I like to spend my summer holidays making as many of the costumes as possible it stands to reason that planning needs to be in place before that period arrives.  Unfortunately, as I have said before, there is one thing that often gets in the way...money.
So here is my annual plan of how it should go (although there are often out of control events that make this plan unworkable which is how I got so behind before, this year I intend it to be different).
  • ·         Get all the odd jobs out of the way a soon as possible.  Cleaning, mending and altering should be finished before anything else happens.
  • ·         Are there any gaps in your costume wardrobe?  For me this year it was the chorus so I have put some time aside to get that up and running
  • ·         Make sure you have your budget beforehand and preferably cash in hand so you can get those bits when you need them and not waiting for your local treasurer to have the time to get it to you.  This is really important as one year I found myself waiting nearly 6 months to be reimbursed £150 due to the treasurers personal problems, if you can afford to wait then don’t worry about this but if you can’t be aware that getting money to you may not be top of their list in importance. 
  • ·         Once you know what your panto will be, start looking at possible costumes and make sure you have your budget available to you (am I pushing this point? I do hope so!).  We have our announcement end March/beginning April so there is plenty of time for designs to be drafted and put to the producer and actors if this is necessary.  You may not have as long but ensure that you know, more or less, what you are doing before you start
  • ·         Get your fabrics and trims decided on, bought, washed and ironed.
  • ·         Make sure you have all your casts measurements, I keep mine in a book so I always know where they are
  • ·         Get sewing, this may include fittings as you sew
  • ·         As soon as I have a costume made I do a final fitting on the cast member, as long as it fits it then gets put away
  • ·         We have a photo call for the local newspaper  end November/early December, you really need main characters in full costume for this if possible
  • ·         Full dress rehearsals should have everything made and ready to go, at this point you may find some tweaking or repairs are necessary
  • ·         The week before performances we have a full dress rehearsal, when  the costumes are finished with see what needs cleaning and then iron it all, hang it up and look on in amazement at all you have achieved
  • ·         Be prepared during the performance with some safety pins, needle and thread and any other quick fix repair elements!
  • ·         Sit back and enjoy the fruits of your labour